Table of Content
- Inspiration
- Preparing the Data
- Structure of data storage
- Download the Dependency Packages in RStudio
- Loading the training data set
- Feature engineering
- Build the Support Vector Machine model
- Loading the testing data set
- Implement for Prediction and Check Metrics
Inspiration
The objective of writing this article is to use very crude approach of doing image classification, in this case images of hand written text. While we use Convolutional Neural Network models from scratch or use pre trained model on MNIST data sets, its more preconditioned for this job. We use transfer learning and in that process as a student myself, I miss out on the very basics. Its like I am driving a automatic car, wherein I know what the drivetrain, the clutch, the accelerator and brakes do, but I don't know anything beyond these. We attempt to break down a problem of hand written alphabet image recognition into a simple process rather than using heavy packages. This is an attempt to create the data and then build a model using Support Vector Machines for Classification.
Preparing the Data
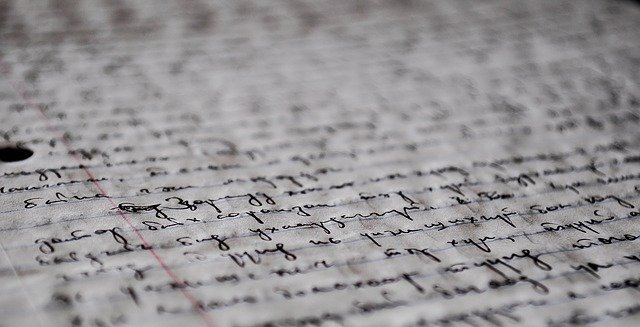
We are going to manually prepare the data rather then download if from the web. This would allow us to understand our data from an initial stage. We are going to write a few alphabets manually on a white sheet and take images from our camera phone. We would then port it to our hard drive. Since its an experiment wherein, I don't want to spend a lot of time in the initial run, I would create data for may be two or three distinct alphabets for demonstration. Its recommended that you try this mechanism for all the alphabets and see the efficiency. You may need to modify your code when you add more class of alphabets, but that's where the learning part will start. We are right now just in the training phase.
Structure of data storage
We can either write the alphabets on white paper and then extract it using a phone camera or directly use a graphics tool like paint to write using the pen tool. I have created two folders train and test. In the train folder we can save folders with alphabet name while in the test folder we can dump the images for which we want to finally classify the instances. The training sub folders have been kept with an intention to have the sub folder name as the training tags. The Testing folder has not been kept in the same form as here we intend to do the classification.
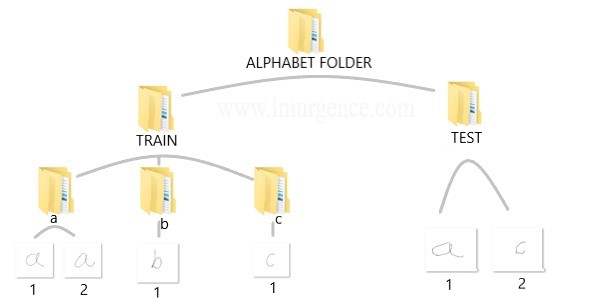
Figure 1: File Schema of Hand Written Images
Alternatively if you want to download the data which I have used, right click on this download data link and open in new tab or window. Then unzip the folders and you should be able to see the same structure and data as above in your downloads folder. Later you should create your own data and do the whole process again. This would give exposure to the complete cycle.
Download the Dependency Packages in RStudio
We will be using the jpeg package in R for Image handling and the Support vector machine implementation from kernlab package. This would be a one time install. Also we have made sure the image data has dimension's of 200 x 200 pixels, with a horizontal and vertical resolution of 120dpi. You can try variations in the color channels and resolution later once you have implemented it in the current form.
    # install package"jpeg"
    install.packages("jpeg", dependencies = TRUE)

    # install the "kernlab" package for building the model using support vector machines
    install.packages("kernlab", dependencies= TRUE)
Loading the training data set
    # load the "jpeg" package for reading the JPEG format files
    library(jpeg)

    # set the working directory for reading the training image data set
    setwd("C:/Users/mohan/Desktop/alphabet_folder/Train")

    # extract the directory names for using as image labels
    f_train<-list.files()

    # Create an empty data frame to store the image data labels and the extracted new features in training environment
    df_train<- data.frame(matrix(nrow=0,ncol=5))
Feature engineering
Since our intention is to not use typical CNN approach we are going to use the white, grey and black pixel values for new feature creation. We intend to use the summation of all the pixel values of a image instance and save it in a feature called as "sum", the count of all pixels evaluating to zero as "zero", the count of all pixels evaluating to "ones" and the sum of all pixels evaluating to values other than zero's and one's as "in_between". The "label" feature is extracted from the folder name.
    # names the columns of the data frame as per the feature name schema
    names(df_train) <- c("sum","zero","one","in_between","label")

    # loop to compute as per the logic
    counter <-1

    for(i in 1:length(f_train))
    {
        setwd(paste("C:/Users/mohan/Desktop/alphabet_folder/Train/",f_train[i],sep=""))

        data_list <-list.files()

        for(j in 1:length(data_list))
        {
            temp<- readJPEG(data_list[j])
            df_train[counter,1] <- sum(temp)
            df_train[counter,2] <- sum(temp==0)
            df_train[counter,3] <- sum(temp==1)
            df_train[counter,4] <- sum(temp > 0 & temp < 1)
            df_train[counter,5] <- f_train[i]
            counter=counter+1
        }
    }
Build the Support Vector Machine model
    # load the "kernlab" package for accessing the support vector machine implementation
    library(kernlab)

    # build the model using the training data
    image_classifier <- ksvm(label~.,data=df_train)
Loading the testing data set
    # set the working directory for reading the testing image data set
    setwd("C:/Users/mohan/Desktop/alphabet_folder/Test")

    # extract the directory names for using as image labels
    f_test <- list.files()

    # Create an empty data frame to store the image data labels and the extracted new features in training environment
    df_test<- data.frame(matrix(nrow=0,ncol=5))

    # Repeat of feature extraction in test data

    names(df_test)<- c("sum","zero","one","in_between","label")

    # loop to compute as per the logic
    for(i in 1:length(f_test))
    {
        temp<- readJPEG(f_test[i])
        df_test[i,1]<- sum(temp)
        df_test[i,2]<- sum(temp==0)
        df_test[i,4]<- sum(temp > 0 & temp < 1)
        df_test[i,5]<- strsplit(x = f_test[i],split = "[.]")[[1]][1]
    }
Implement for Prediction and Check Metrics
    # Use the classifier named "image_classifier" built in train environment to predict the outcomes on features in Test environment
    df_test$label_predicted<- predict(image_classifier,df_test)
    # Cross Tab for Classification Metric evaluation
    table(Actual_data=df_test$label,Predicted_data=df_test$predicted_label)
I would encourage you to learn concepts of Support Vector Machine which couldn’t be explored completely in this article by clicking on this link for my free Data Science and Machine Learning video courses. While we have used the kernlab package and created the classifier, there is a lot of mathematics involved starting from vector space to kernel tricks. We have worked on the implementation of the classifier but you should certainly learn the conceptual part of Support Vector Machine and other interesting algorithms.
About the Author:
Write A Public Review