Table of Content
- Create the Environment
- Import Packages
- Load Data and Read files
- Scaling the Data
- Splitting Data into Training and Testing Data Sets
- Building a Convolution NN Model
- Model Evaluation
- Predictions
- Reading Image from Repository and doing Classification
- Predictions on Live WebCam Feed
- Predictions using saved model
- Conclusion
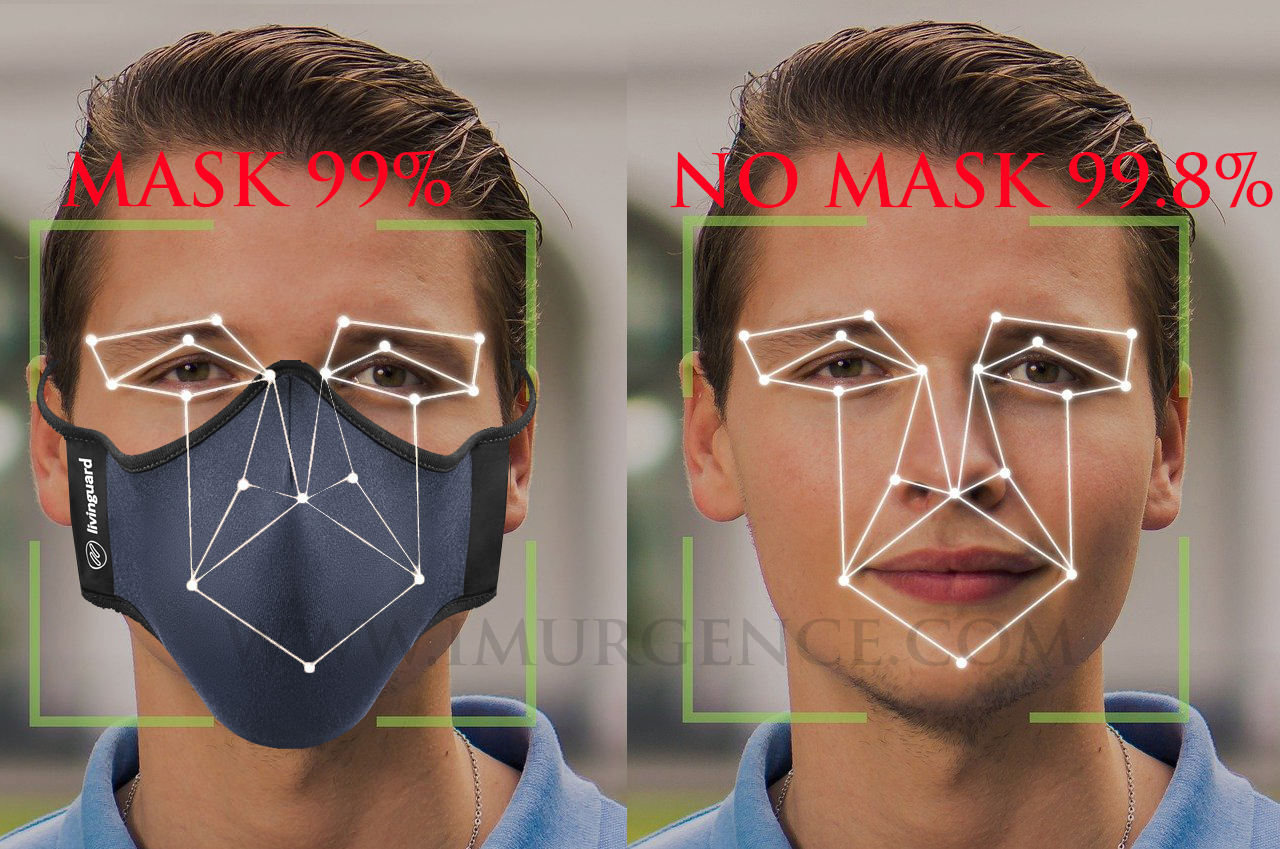
Most of the product development in Computer Vision is around Face Recognition and Image Processing. In this Project, we are going to build a module to use OpenCV, Keras and Tensorflow for Face Mask Detection with Convolution Neural Network. This would be a good Computer Vision project to get exposure.
Using a automated deep learning application a Video Surveillance system at check point can increase the compliance of face mask usage to avoid the spread of air borne viruses. We have attempted to use Face Mask detection for still images as well as live streaming feed. We would be extracting the image data which is available as a downloadable link as you go ahead. Its a zipped file so you need to unzip it. Place it in your working directory. Next we would process the data and train the classifier. The objective would be to train the classifier to differentiate between a person with mask or without mask in image or video. Using the classifier you can classify unlabeled images as well as video.
Create the Environment
Although its not required, but many of us might not have all the compatible packages and their versions might be different. So its always a good ideal to create a new environment for an application like this. I have created this on python 3.6 version but tested it on 3.8, as well. You can use which ever you have or create a new environment. To complete this implementation, you don't need to execute this step. Its for those who have never deployed packages for Computer vision. Those who have a running instance which support the import package list below can skip this process. We have done this in the anaconda prompt. Mac/Linux users can user terminal.
    conda create -n facemaskdetection python=3.6 anaconda
    conda activate facemaskdetection
    pip install opencv-python
    pip install tensorflow
    pip install keras
    pip install cvlib
    pip install asgiref
    pip install cv2-tools
Import Packages
    import cv2
    import os
    from tensorflow import keras
    from tensorflow.keras import layers
    from tensorflow.keras.models import Sequential
    import tensorflow as tf
    import numpy as np
    from tensorflow.keras.layers import BatchNormalization, Conv2D, MaxPooling2D, Activation, Flatten, Dropout, Dense
    from tensorflow.keras import backend as K
    from keras.utils import np_utils
    from sklearn.model_selection import train_test_split
    from tensorflow.keras.callbacks import ModelCheckpoint
    import matplotlib.pyplot as plt
    import cvlib as cv
    from keras.models import load_model
Load Data and Read files
    # Download Data in Zip Format
    # There would be 2 folders : with mask and without mask inside dataset folder
    # You will need to place the dataset folder in your working directory
    data_path = 'dataset'
    categories = os.listdir(data_path)

    labels = [i for i in range(len(categories))]
    label_dict = dict(zip(categories, labels))

    print(label_dict)
{'without_mask': 0, 'with_mask': 1}

    print(categories)
['without_mask', 'with_mask']

    print(labels)
[0, 1]
Read the image files and store it for use
    img_size = 100
    data = []
    target = []

    for category in categories:
        folder_path = os.path.join(data_path,category)
        img_names = os.listdir(folder_path)
        for img_name in img_names:
            img_path = os.path.join(folder_path, img_name)
            img = cv2.imread(img_path)

            try:
                resized = cv2.resize(img, (img_size,img_size))
                data.append(resized)
                target.append(label_dict[category])

            except Exception as Exp:
                print('Exception:', Exp)
Check the length of the feed data
    len(data)
1015

    len(target)
1015
Scaling the Data
    img_size = 100

    data = np.array(data)/255.0
    target = np.array(target)

    target = np.array(target)
    new_target = np_utils.to_categorical(target)

    new_target[:3]
array([[1., 0.],
       [1., 0.],
       [1., 0.]], dtype=float32)

    data.shape[1:]
(100, 100, 3)

    new_target.shape
(1015, 2)
Splitting Data into Training and Testing Data Sets
    train_data,test_data,train_target,test_target=train_test_split(data,new_target,test_size=0.1)
    train_data.shape,test_data.shape, train_target.shape
((913, 100, 100, 3), (102, 100, 100, 3), (913, 2))
Building a Convolution NN Model
    num_classes = 2
    model = Sequential([
      layers.Conv2D(16, 3, padding ='same', activation ='relu'),
      layers.MaxPooling2D(),
      layers.Conv2D(32, 3, padding ='same', activation ='relu'),
      layers.MaxPooling2D(),
      layers.Flatten(),
      layers.Dense(32, activation ='relu'),
      layers.Dense(16, activation ='relu'),
      layers.Dense(num_classes, activation = 'sigmoid')
    ])

    model.compile(optimizer ='adam',
                  loss ='binary_crossentropy',
                  metrics =['accuracy'])

    model.fit(train_data, train_target, epochs = 35)
Epoch 1/35
29/29 [==============================] - 5s 146ms/step - loss: 0.6793 - accuracy: 0.6476
Epoch 2/35
29/29 [==============================] - 4s 145ms/step - loss: 0.5112 - accuracy: 0.7828
Epoch 3/35
29/29 [==============================] - 4s 145ms/step - loss: 0.2868 - accuracy: 0.8976
Epoch 4/35
29/29 [==============================] - 4s 150ms/step - loss: 0.2405 - accuracy: 0.9213
Epoch 5/35
29/29 [==============================] - 4s 146ms/step - loss: 0.1977 - accuracy: 0.9334
.
.
.
.
Epoch 31/35
29/29 [==============================] - 6s 220ms/step - loss: 2.5952e-04 - accuracy: 1.0000
Epoch 32/35
29/29 [==============================] - 6s 205ms/step - loss: 2.7445e-04 - accuracy: 1.0000
Epoch 33/35
29/29 [==============================] - 6s 201ms/step - loss: 2.2145e-04 - accuracy: 1.0000
Epoch 34/35
29/29 [==============================] - 5s 161ms/step - loss: 1.9764e-04 - accuracy: 1.0000
Epoch 35/35
29/29 [==============================] - 6s 191ms/step - loss: 2.1301e-04 - accuracy: 1.0000

    checkpoint = ModelCheckpoint('model-{epoch:03d}.model', monitor ='val_loss',verbose = 0, save_best_only= True,mode = 'auto')
    history = model.fit(train_data, train_target, epochs=20, callbacks=[checkpoint], validation_split = 0.2)
Epoch 1/20
23/23 [==============================] - 4s 170ms/step - loss: 1.8309e-04 - accuracy: 1.0000 - val_loss: 1.4780e-04 - val_accuracy: 1.0000
INFO:tensorflow:Assets written to: model-001.model\assets
Epoch 2/20
23/23 [==============================] - 4s 163ms/step - loss: 1.6584e-04 - accuracy: 1.0000 - val_loss: 1.4813e-04 - val_accuracy: 1.0000
Epoch 3/20
23/23 [==============================] - 4s 162ms/step - loss: 1.4938e-04 - accuracy: 1.0000 - val_loss: 1.4615e-04 - val_accuracy: 1.0000
INFO:tensorflow:Assets written to: model-003.model\assets
Epoch 4/20
23/23 [==============================] - 4s 164ms/step - loss: 1.4106e-04 - accuracy: 1.0000 - val_loss: 1.4838e-04 - val_accuracy: 1.0000
Epoch 5/20
23/23 [==============================] - 4s 162ms/step - loss: 1.2827e-04 - accuracy: 1.0000 - val_loss: 1.4436e-04 - val_accuracy: 1.0000
INFO:tensorflow:Assets written to: model-005.model\assets
.
.
.
.
.
.
Epoch 15/20
23/23 [==============================] - 4s 176ms/step - loss: 6.6669e-05 - accuracy: 1.0000 - val_loss: 1.3966e-04 - val_accuracy: 1.0000
Epoch 16/20
23/23 [==============================] - 4s 185ms/step - loss: 6.2696e-05 - accuracy: 1.0000 - val_loss: 1.7073e-04 - val_accuracy: 1.0000
Epoch 17/20
23/23 [==============================] - 4s 176ms/step - loss: 6.1860e-05 - accuracy: 1.0000 - val_loss: 1.4881e-04 - val_accuracy: 1.0000
Epoch 18/20
23/23 [==============================] - 4s 177ms/step - loss: 5.6138e-05 - accuracy: 1.0000 - val_loss: 1.5815e-04 - val_accuracy: 1.0000
Epoch 19/20
23/23 [==============================] - 4s 176ms/step - loss: 5.2876e-05 - accuracy: 1.0000 - val_loss: 1.5723e-04 - val_accuracy: 1.0000
Epoch 20/20
23/23 [==============================] - 5s 224ms/step - loss: 5.0068e-05 - accuracy: 1.0000 - val_loss: 1.5006e-04 - val_accuracy: 1.0000
Model Evaluation
    print(model.evaluate(test_data, test_target))
4/4 [==============================] - 0s 36ms/step - loss: 0.6244 - accuracy: 0.9020
[0.6244447231292725, 0.9019607901573181]
Predictions
# Image without mask being classified as demo
plt.imshow(test_data[9])
predictions = model.predict(test_data)[9]
inx = np.argmax(predictions)
targets = ['without_mask', 'with_Mask']
targets[inx]
'without_mask'
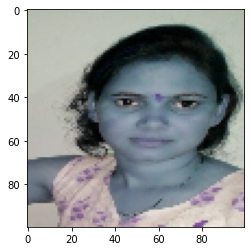 Figure 1 : Image without mask
# Image with mask being classified as demo
plt.imshow(test_data[10])
predictions = model.predict(test_data)[10]
inx = np.argmax(predictions)
targets[inx]
'with_Mask'
Figure 1 : Image without mask
# Image with mask being classified as demo
plt.imshow(test_data[10])
predictions = model.predict(test_data)[10]
inx = np.argmax(predictions)
targets[inx]
'with_Mask'
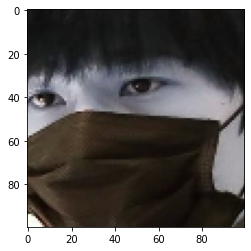 Figure 2 : Image with mask
Reading Image from Repository and doing Classification
Lets predict on existing data with label on the image itself for ease of reference and validation. We will consider 2 cases from each class. Lets define the classes also for ease of tagging.
classes = ['No Mask','Mask']
path = './dataset/with_mask/with_mask271.jpg'
img = cv2.imread(path)
face, confidence = cv.detect_face(img)
(startX, startY) = face[0][0],face[0][1]
(endX, endY) = face[0][2],face[0][3]
cv2.rectangle(img,(startX, startY),(endX, endY),(0,255,0), 4)
face_crop = np.copy(img[startY:endY, startX:endX])
# Image Preprocessing
face_crop = cv2.resize(face_crop, (100,100))
face_crop = np.array(face_crop)
face_crop = face_crop/255.0
face_crop = np.expand_dims(face_crop, axis = 0)
conf = model.predict(face_crop)[0]
dx = np.argmax(conf)
label = classes[dx]
label = '{}: {:.2f}%'.format(label, conf[dx] * 100)
Y = startY - 10 if startY - 10 > 10 else startY + 10
# write label and confidence above face rectangle
cv2.putText(img, label , (startX, Y), cv2.FONT_HERSHEY_SIMPLEX,
0.9, (0, 255, 0), 2)
plt.figure(figsize = (14,10))
plt.imshow(img)
plt.title("Face Mask Detection")
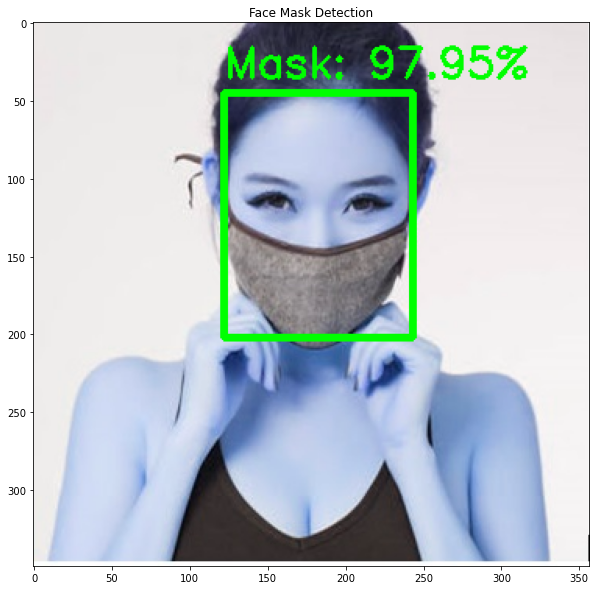 Figure 3 : Face mask detection image case 1
path = './dataset/with_mask/with_mask400.jpg'
img = cv2.imread(path)
face, confidence = cv.detect_face(img)
(startX, startY) = face[0][0],face[0][1]
(endX, endY) = face[0][2],face[0][3]
cv2.rectangle(img,(startX, startY),(endX, endY),(0,255,0), 4)
face_crop = np.copy(img[startY:endY, startX:endX])
# Image Preprocessing
face_crop = cv2.resize(face_crop, (100,100))
face_crop = np.array(face_crop)
face_crop = face_crop/255.0
face_crop = np.expand_dims(face_crop, axis = 0)
conf = model.predict(face_crop)[0]
dx = np.argmax(conf)
label = classes[dx]
label = '{}: {:.2f}%'.format(label, conf[dx] * 100)
Y = startY - 10 if startY - 10 > 10 else startY + 10
# write label and confidence above face rectangle
cv2.putText(img, label , (startX, Y), cv2.FONT_HERSHEY_SIMPLEX,
0.9, (0, 255, 0), 2)
plt.figure(figsize = (14,10))
plt.imshow(img)
plt.title("Face Mask Detection")
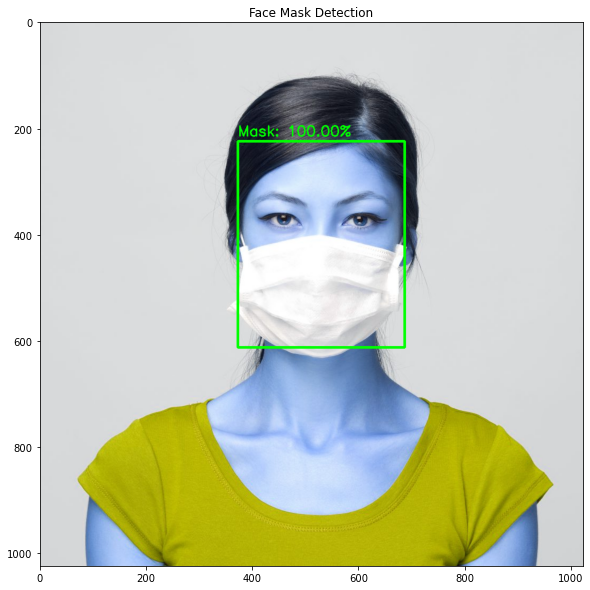 Figure 4 : Face mask detection image case 2
path = './dataset/without_mask/140.jpg'
img = cv2.imread(path)
face, confidence = cv.detect_face(img)
(startX, startY) = face[0][0],face[0][1]
(endX, endY) = face[0][2],face[0][3]
cv2.rectangle(img,(startX, startY),(endX, endY),(0,255,0), 4)
face_crop = np.copy(img[startY:endY, startX:endX])
# Image Preprocessing
face_crop = cv2.resize(face_crop, (100,100))
face_crop = np.array(face_crop)
face_crop = face_crop/255.0
face_crop = np.expand_dims(face_crop, axis = 0)
conf = model.predict(face_crop)[0]
dx = np.argmax(conf)
label = classes[dx]
label = '{}: {:.2f}%'.format(label, conf[dx] * 100)
Y = startY - 10 if startY - 10 > 10 else startY + 10
# write label and confidence above face rectangle
cv2.putText(img, label , (startX, Y), cv2.FONT_HERSHEY_SIMPLEX,
0.9, (0, 255, 0), 2)
plt.figure(figsize = (14,10))
plt.imshow(img)
plt.title("Face Mask Detection")
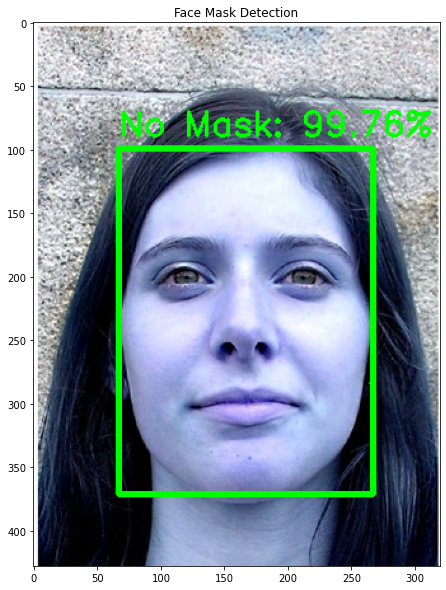 Figure 5 : Face mask detection image case 3
path = './dataset/without_mask/145.jpg'
img = cv2.imread(path)
face, confidence = cv.detect_face(img)
(startX, startY) = face[0][0],face[0][1]
(endX, endY) = face[0][2],face[0][3]
cv2.rectangle(img,(startX, startY),(endX, endY),(0,255,0), 4)
face_crop = np.copy(img[startY:endY, startX:endX])
# Image Preprocessing
face_crop = cv2.resize(face_crop, (100,100))
face_crop = np.array(face_crop)
face_crop = face_crop/255.0
face_crop = np.expand_dims(face_crop, axis = 0)
conf = model.predict(face_crop)[0]
dx = np.argmax(conf)
label = classes[dx]
label = '{}: {:.2f}%'.format(label, conf[dx] * 100)
Y = startY - 10 if startY - 10 > 10 else startY + 10
# write label and confidence above face rectangle
cv2.putText(img, label , (startX, Y), cv2.FONT_HERSHEY_SIMPLEX,
0.9, (0, 255, 0), 2)
plt.figure(figsize = (14,10))
plt.imshow(img)
plt.title("Face Mask Detection")
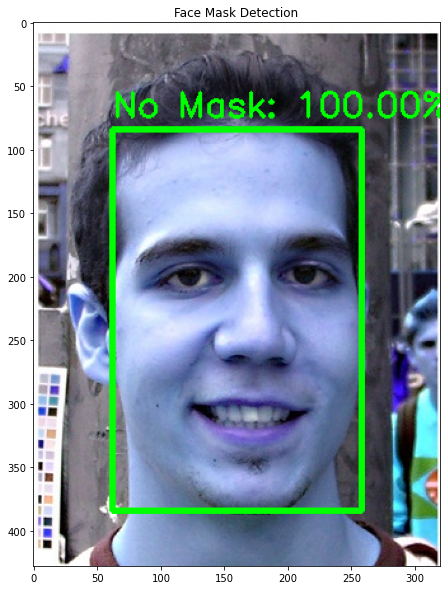 Figure 6 : Face mask detection image case 4
Predictions on Live WebCam Feed
    webcam = cv2.VideoCapture(0)

    while webcam.isOpened():
        status, frame = webcam.read()

        # apply face detection
        face, confidence = cv.detect_face(frame)

        for idx, f in enumerate(face):
            # Isolate corner points of face rectangle
            (startX, startY) = f[0], f[1]
            (endX, endY) = f[2], f[3]

            # Draw a rectange over the face in Video
            cv2.rectangle(frame, (startX,startY), (endX,endY), (0,255,0), 2)

            # Crop the detected face region to pass in model
            face_crop = np.copy(frame[startY:endY, startX:endX])

            if (face_crop.shape[0]) < 10 or (face_crop.shape[1]) < 10:
                continue

            face_crop= cv2.resize(face_crop, (100,100))
            face_crop = np.array(face_crop)
            face_crop = face_crop/255.0
            face_crop = np.expand_dims(face_crop, axis = 0)

            # Apply prediction using the model
            conf = model.predict(face_crop)[0]

            # Extract label with maximum accuracy
            idx = np.argmax(conf)
            label = classes[idx]

            label =label = '{}: {:.2f}%'.format(label, conf[idx] * 100)
            Y = startY - 10 if startY - 10 > 10 else startY + 10

            # Write label and confidence above rectangle marked over face
            cv2.putText(frame, label , (startX, Y), cv2.FONT_HERSHEY_SIMPLEX,
                       0.7, (0, 255, 0), 2)

        cv2.imshow('Face Mask Detection', frame)

        if cv2.waitKey(1) & 0xFF == ord('q'):
            break

    webcam.release()
    cv2.destroyAllWindows()
Predictions using Saved Model
Next time you want to reuse this model you don't need to rerun it. You can load the saved model and use it like below. Note that in your working directory when we worked on the checkpoint and created the history object, the optimal models were written on to your disk. So although you had created several iterations with epochs, only the optimal ones were saved on disk. For instance in my case, I can see that, the list is as below
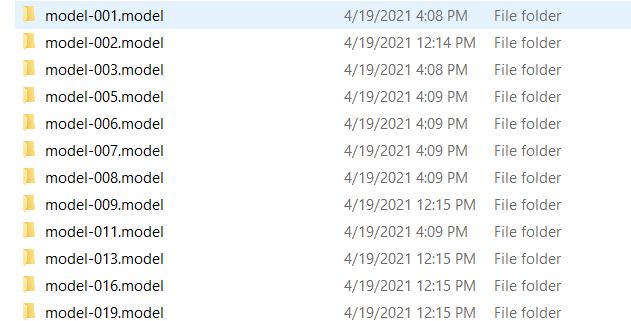
Figure 7 : Saved Deep Learning Model View on disk
    # loading the first of the saved models
    model_saved = keras.models.load_model('model-001.model')
Now you can use any of the saved models and need not train your algorithm. Just pass the image or video feed for which you want to do the classification and it should work.
Conclusion
We created a face mask detector using Deep Learning,Keras, Tensorflow and OpenCV. We trained it to distinguish between people wearing mask and people not wearing a mask. The model is tested with photos and real-time video streams. It detected the face from the images/videos and extracts each individual’s face and applies the face mask classifier to it. Since, we can easily deploy our model to the embedded systems such as Raspberry Pi, Jetson, Google Coral, Nano etc.This can be very helpful for the society and can possibly contribute to the public healthcare compliance. Recommend you to read this interesting article on Image Classification of MNIST data using Logistic Regression.
About the Author's:
Write A Public Review